
Your Course in Uflo
Uflo brings your course materials, assessments, and grading into one place. It turns your files into study tools and grades students’ responses against your rubrics. The results show where your class struggled, so you know what to review.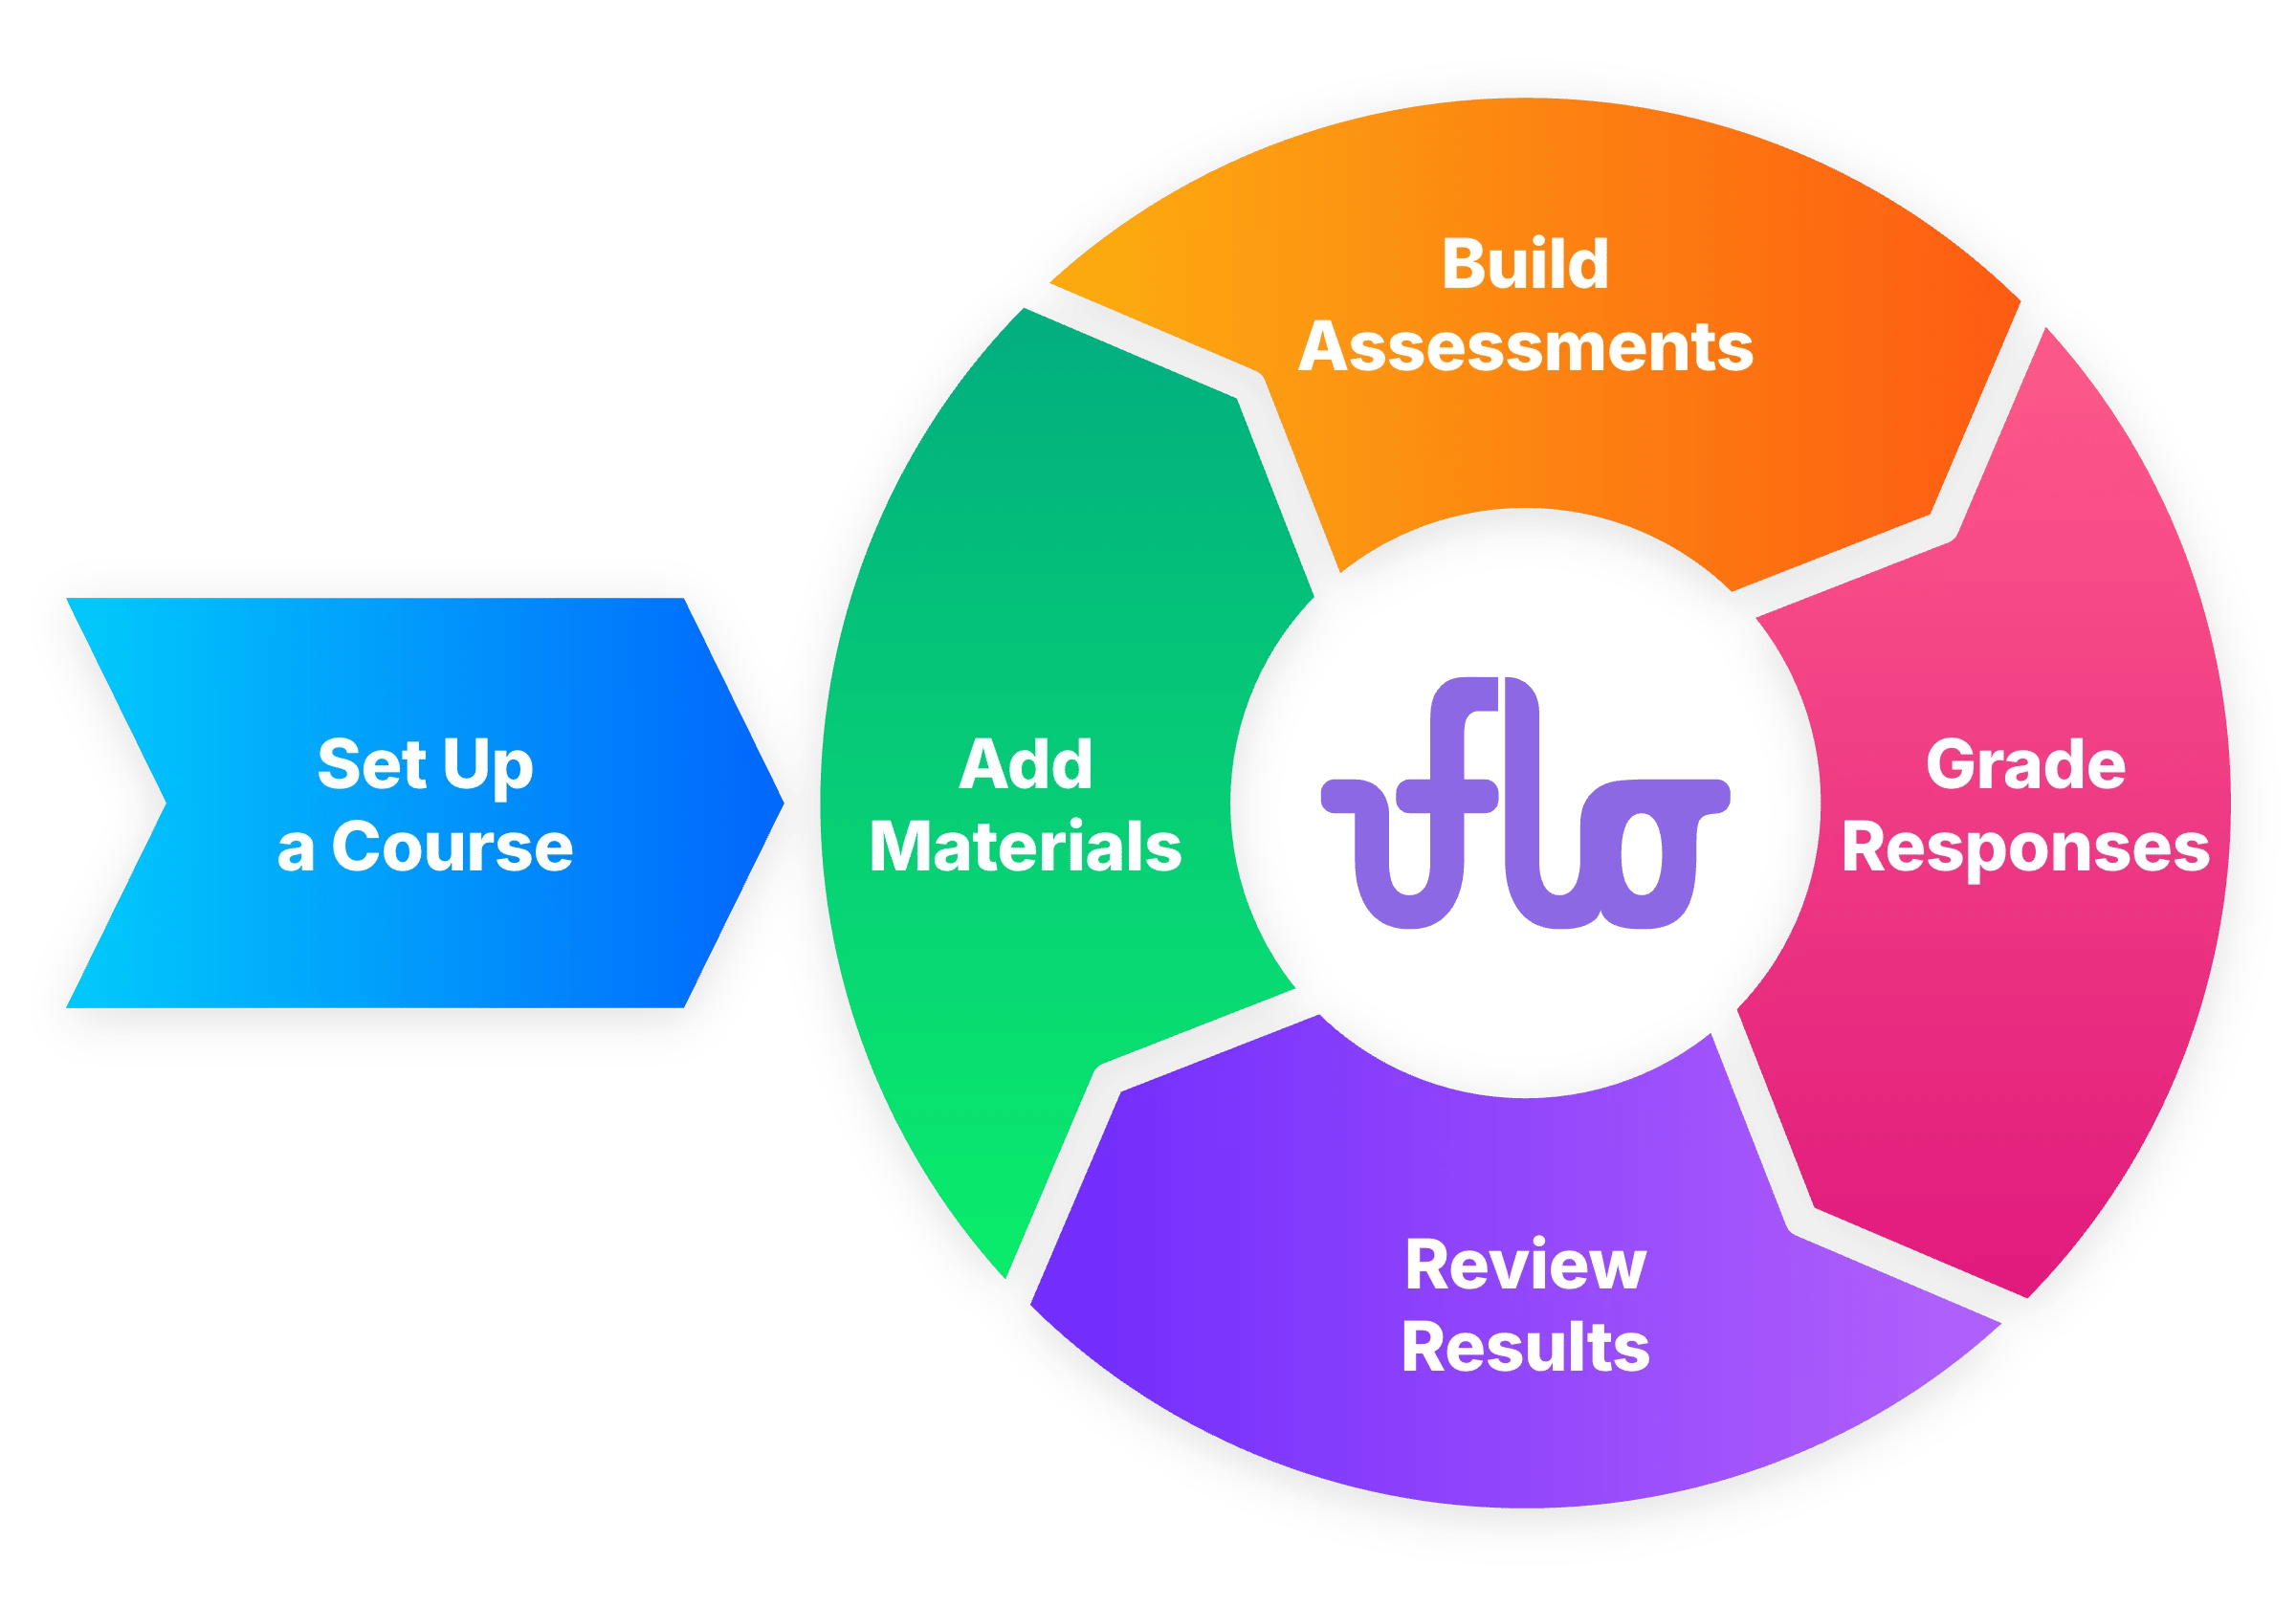
1
Set Up a Course
Create your course manually, or use an integration to let Uflo auto-fill the details. Organize it into chapters and lessons, then invite your students.
2
Add Materials
Upload your slides, readings, recordings, and links to a lesson. Uflo creates the study tools you choose for each file, such as podcasts and visualizations.
3
Build Assessments
An assessment is a lesson that holds questions.
Write the questions in Uflo or import them from an existing document.
Its settings control the due date, the number of attempts, total score and more.
4
Grade Responses
Students take the assessment in Uflo, or you import their submissions from paper exams or your LMS. In Uflo, questions with a set answer, such as multiple choice, grade instantly. Uflo’s AI grades open-ended responses against your rubric.
5
Review Results
Check the scores and the AI’s reasoning, and change any grade you disagree with.
Question analytics show where students struggled and the mistakes they had in common.
When you’re done, export grades for your gradebook.
What Your Students Get
- Study tools give them several ways to review a file and test themselves on it.
- Chat answers their questions about a file, with the file as context.
- The Socratic Tutor guides them to the answer without giving it away.
- Feedback on each graded response shows why they earned or lost points.
Where to Start
How Uflo Works
See how courses, chapters, lessons, and files fit together.
Plan Your Course
Choose your chapters and lessons, and when students can see them.
Create a Course
Set up a course by hand, or let Uflo fill it in from your syllabus.
Grading Exams
Print exams with QR codes, grade the scans with AI, and release the results.