
Phase 1.1 Exam Design
A well-designed exam helps Uflo identify pages, match them to students, and isolate answers for grading. Missing page numbers, unlabeled answer boxes, or absent student ID fields will cause delays and require manual work after scanning. Follow the guidelines below carefully before creating your exam document.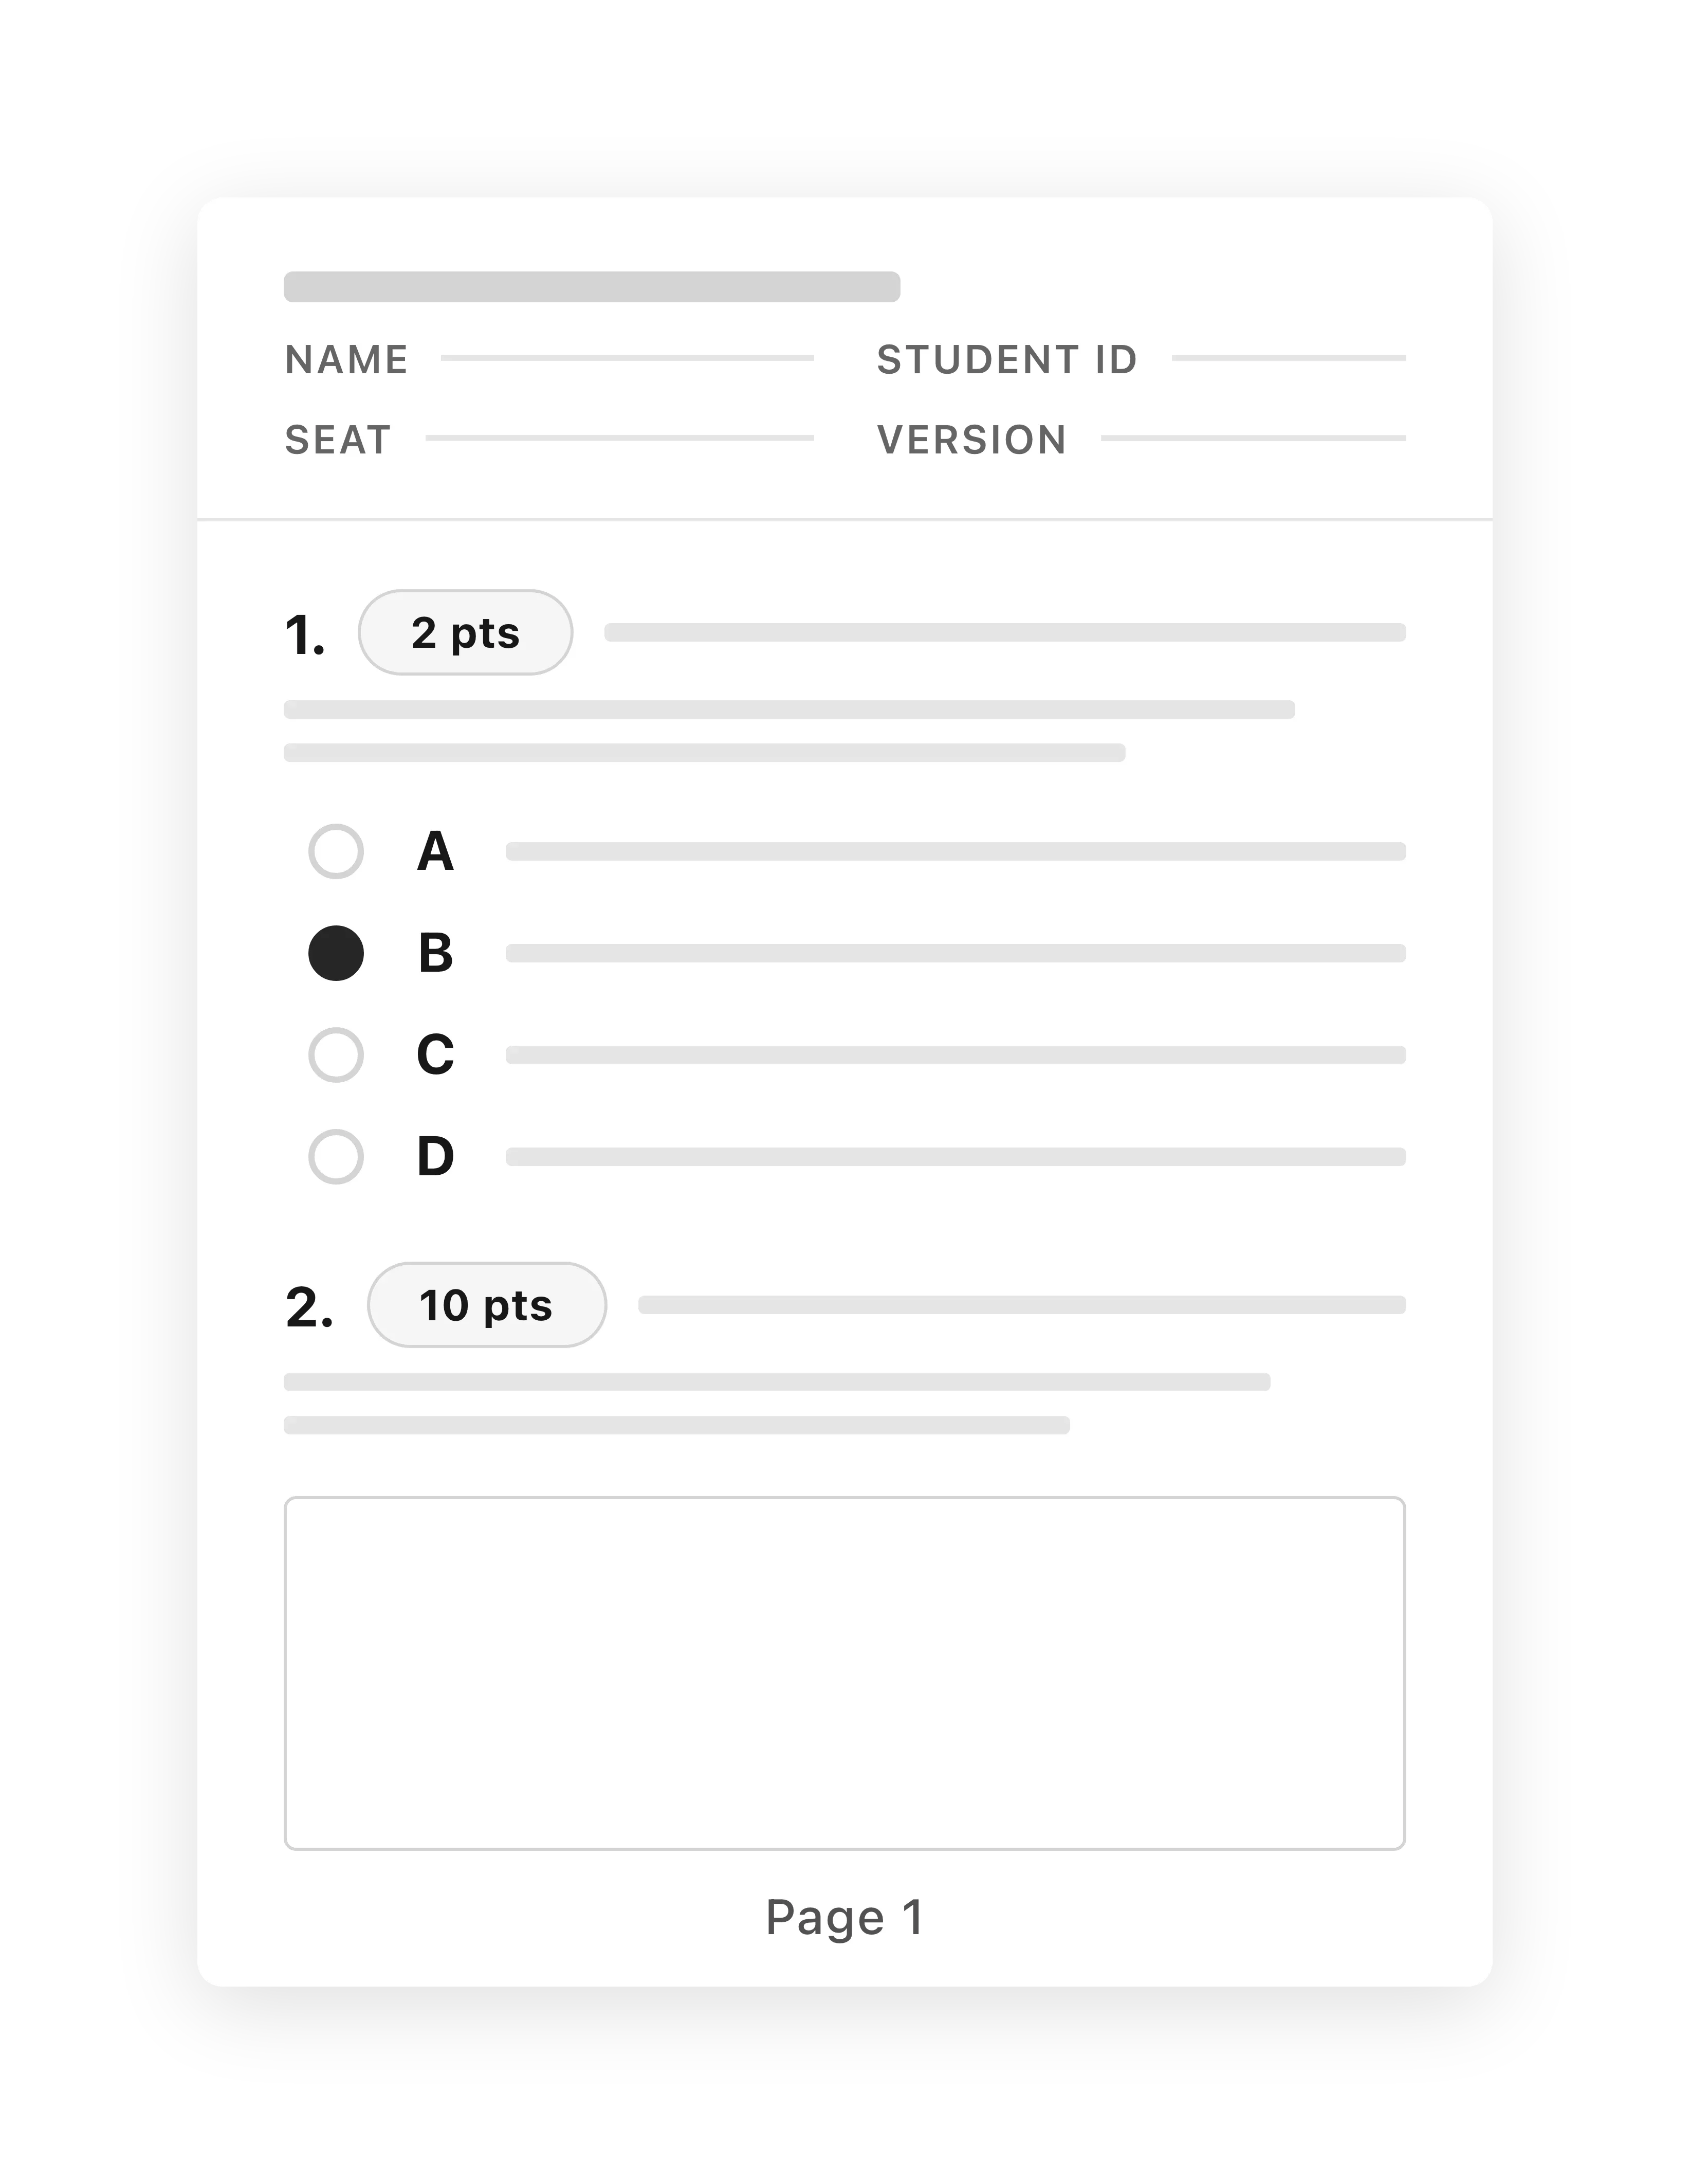

Page Numbers
Every page must have a clearly visible page number. Exams are disassembled and scanned as individual pages, so Uflo relies on page numbers to reconstruct order and detect missing pages.- Place page numbers at the bottom center of each page, including the cover/title page.
- Use at least 10pt font and ensure page numbers are not crowded by other content.
- If your exam has an odd page count, add a blank page so the total is even. Otherwise, the blank back side of the last page will have no page number, causing scanning issues.
Student ID Fields
In order for Uflo to identify each student, the first page of the exam must include:- Student full name
- Student ID number
- Additional fields as needed (date of exam, seat number, etc.)
- Student identifiers on every page of the exam (recommended)
Formatting Questions
- Free Response
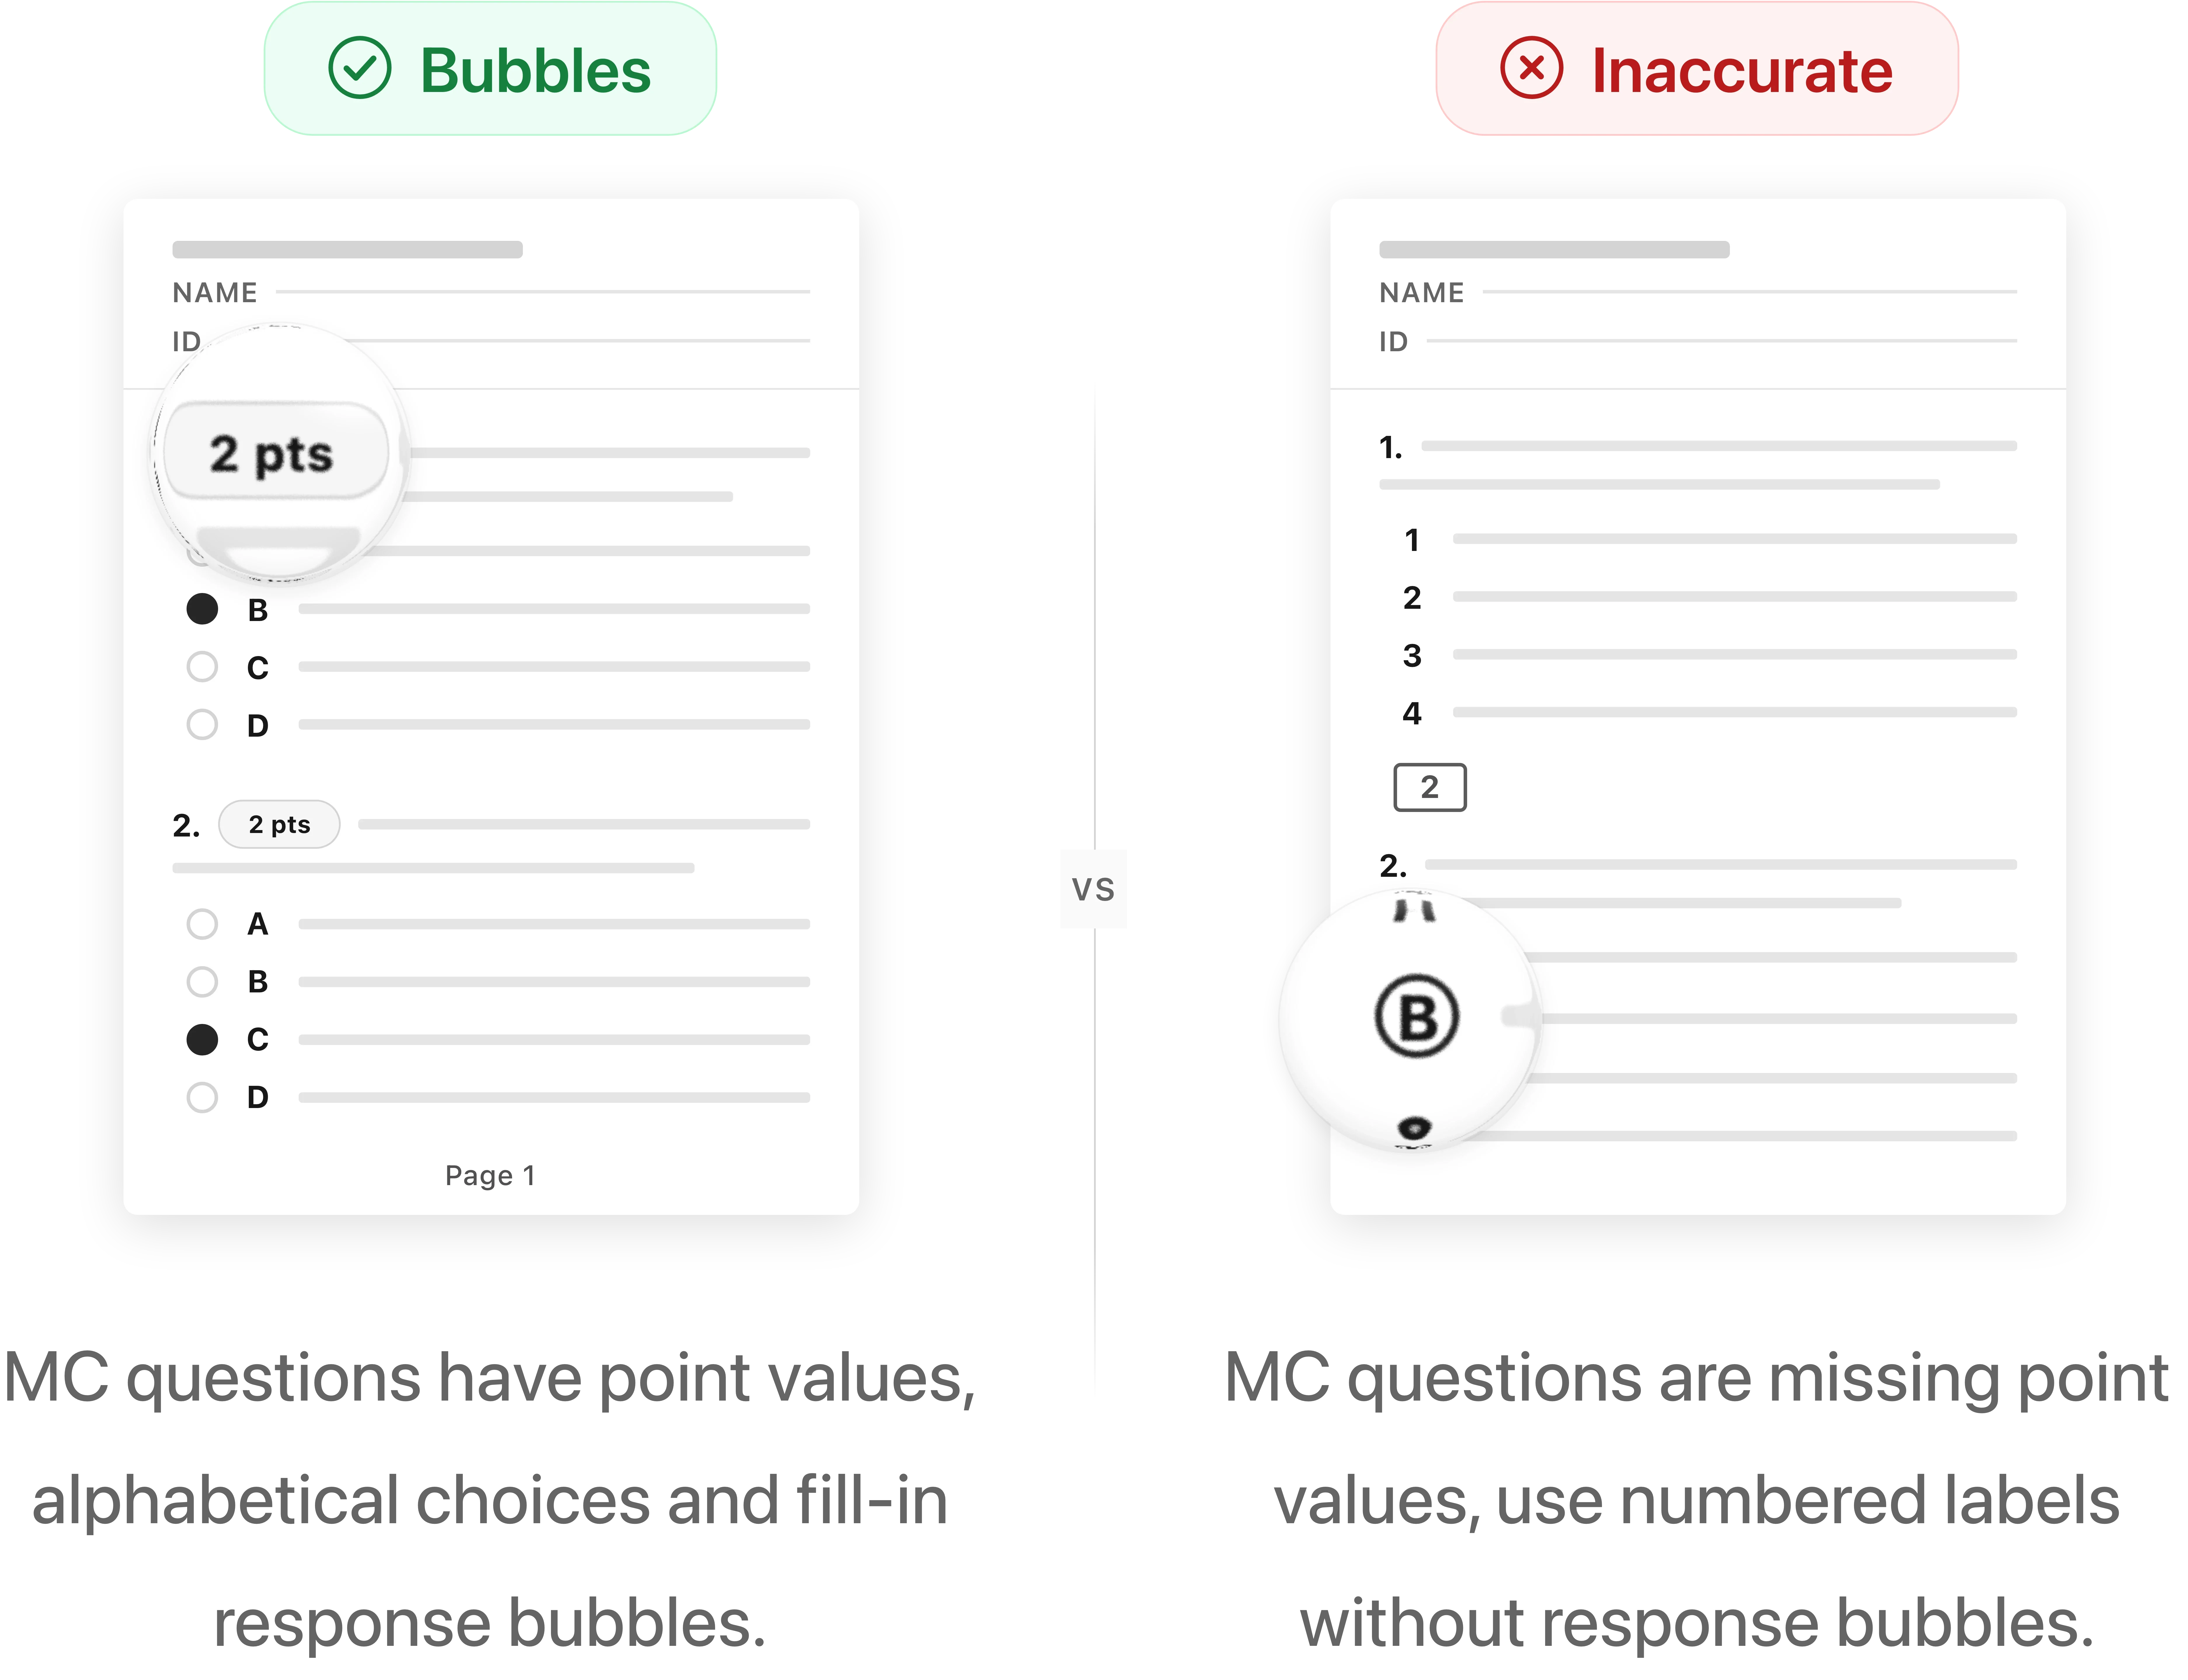
- Multiple Choice
- Other
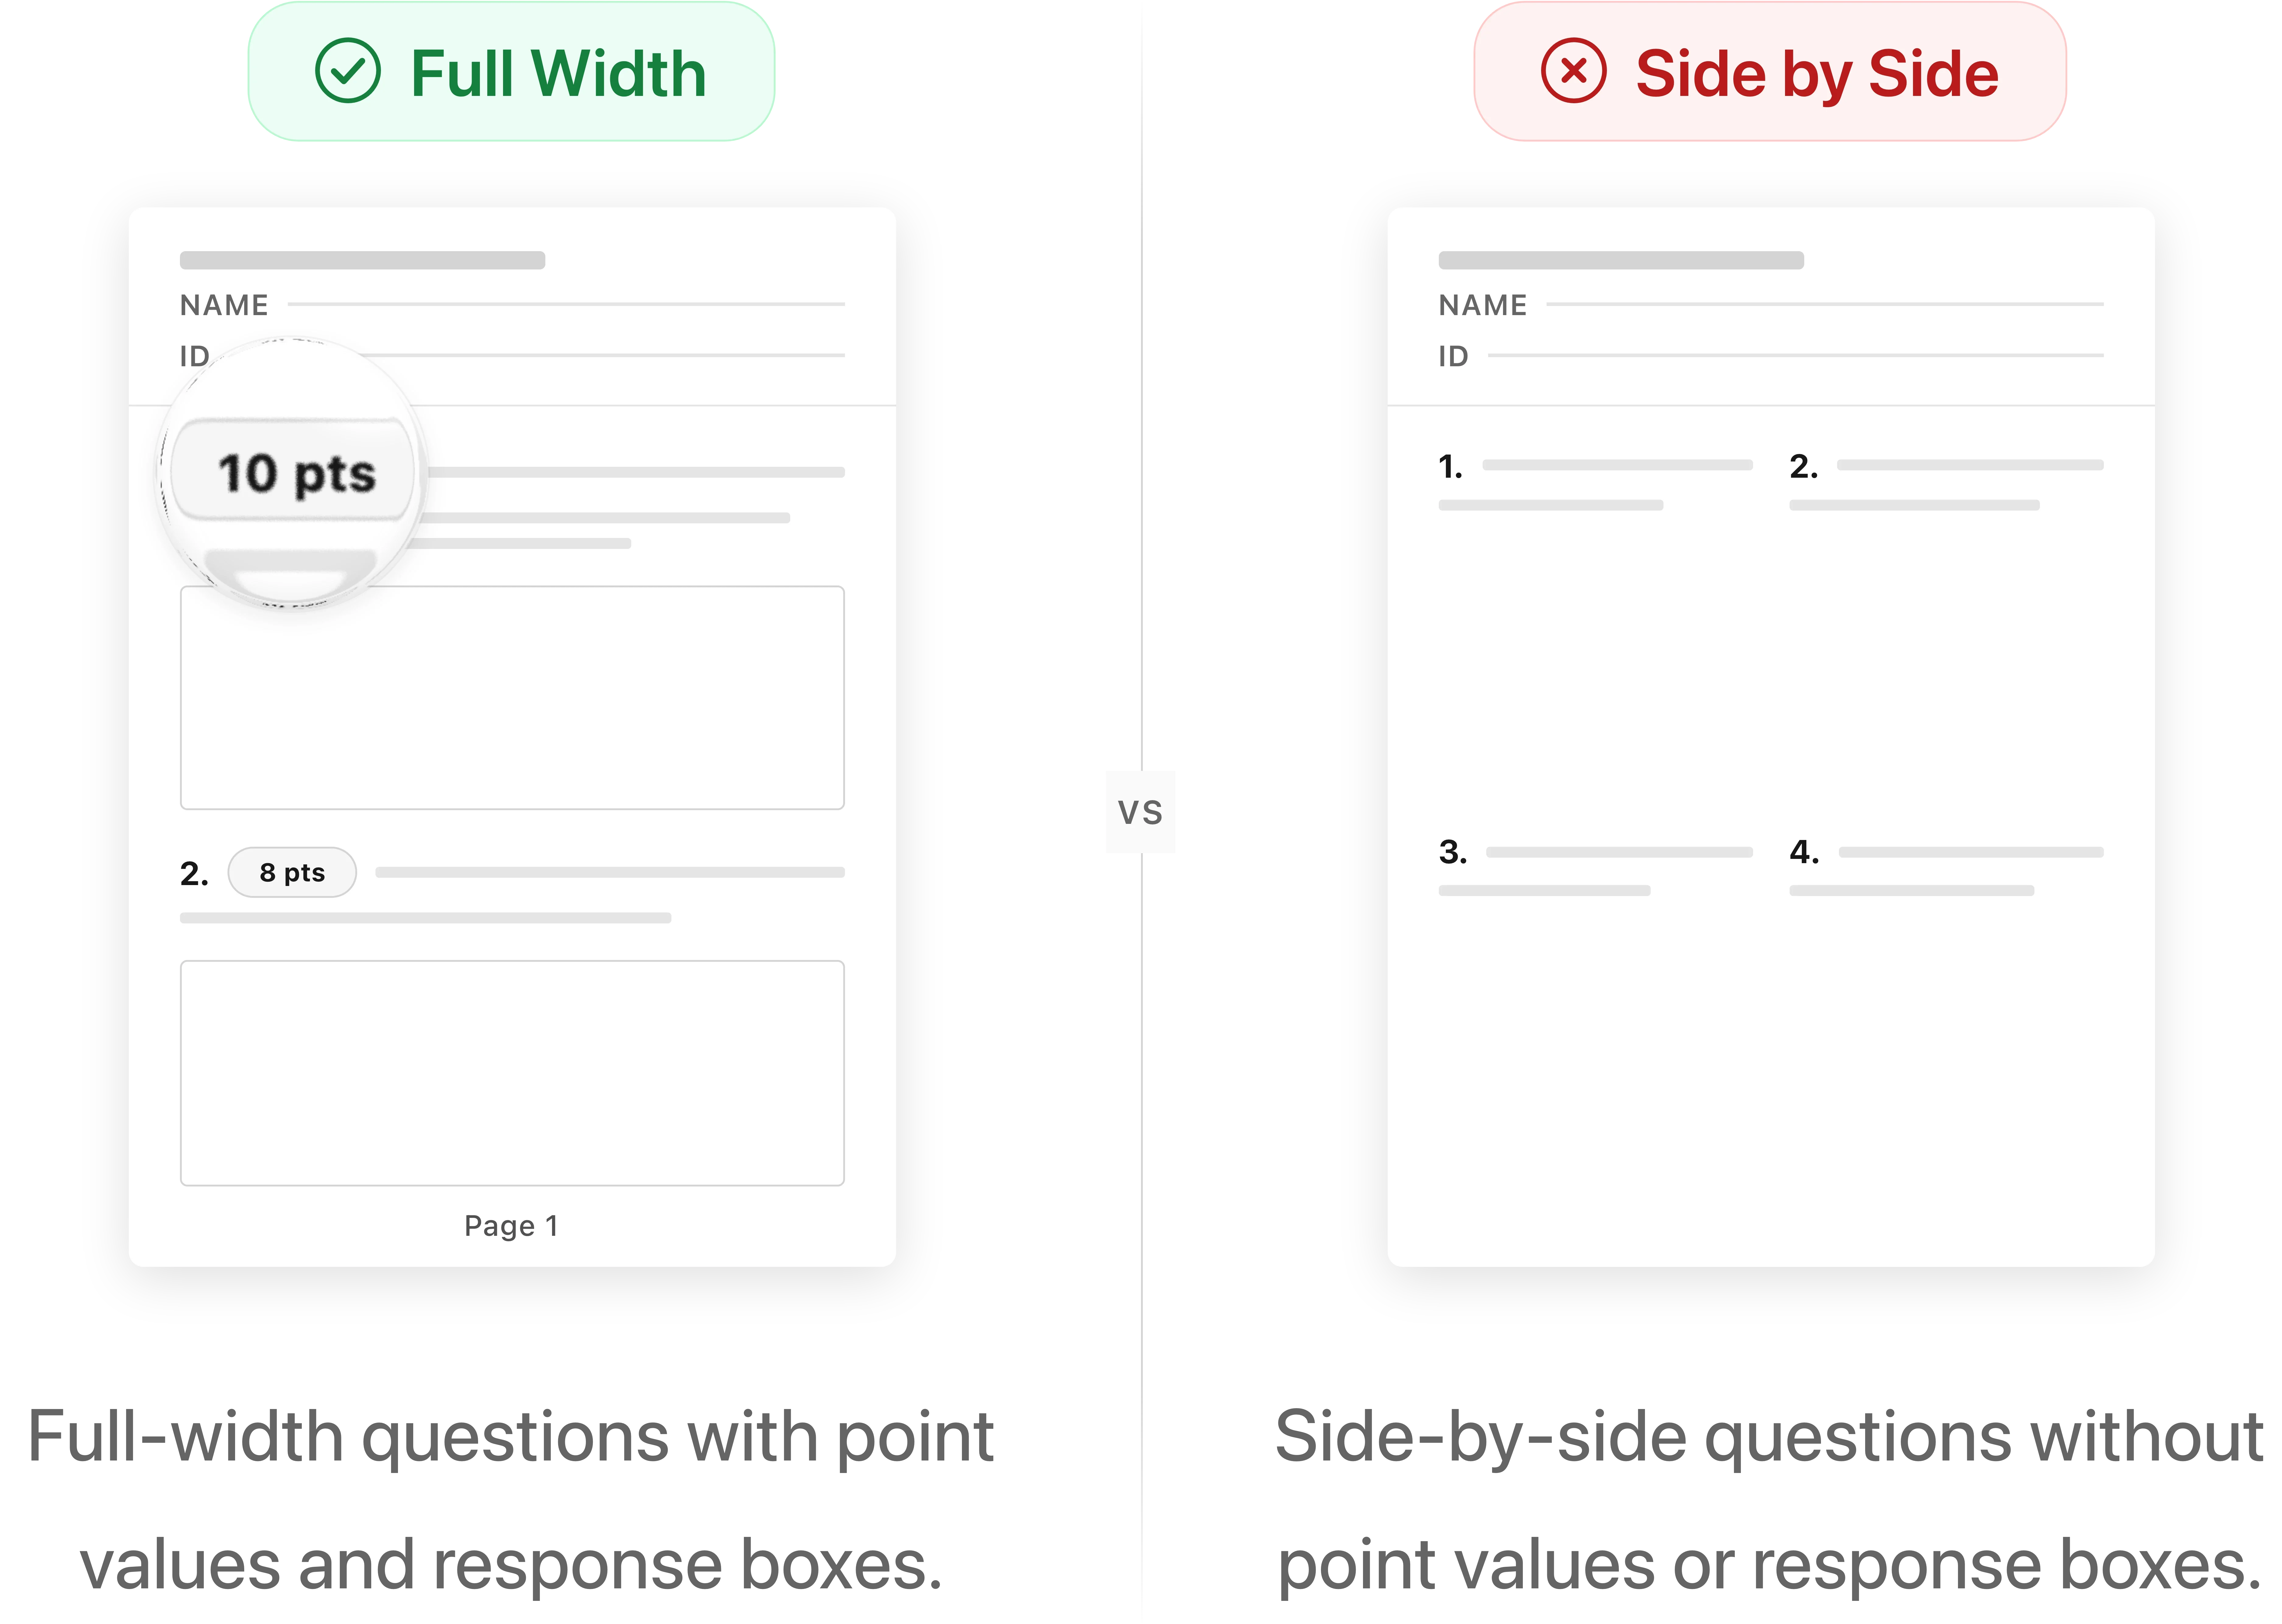
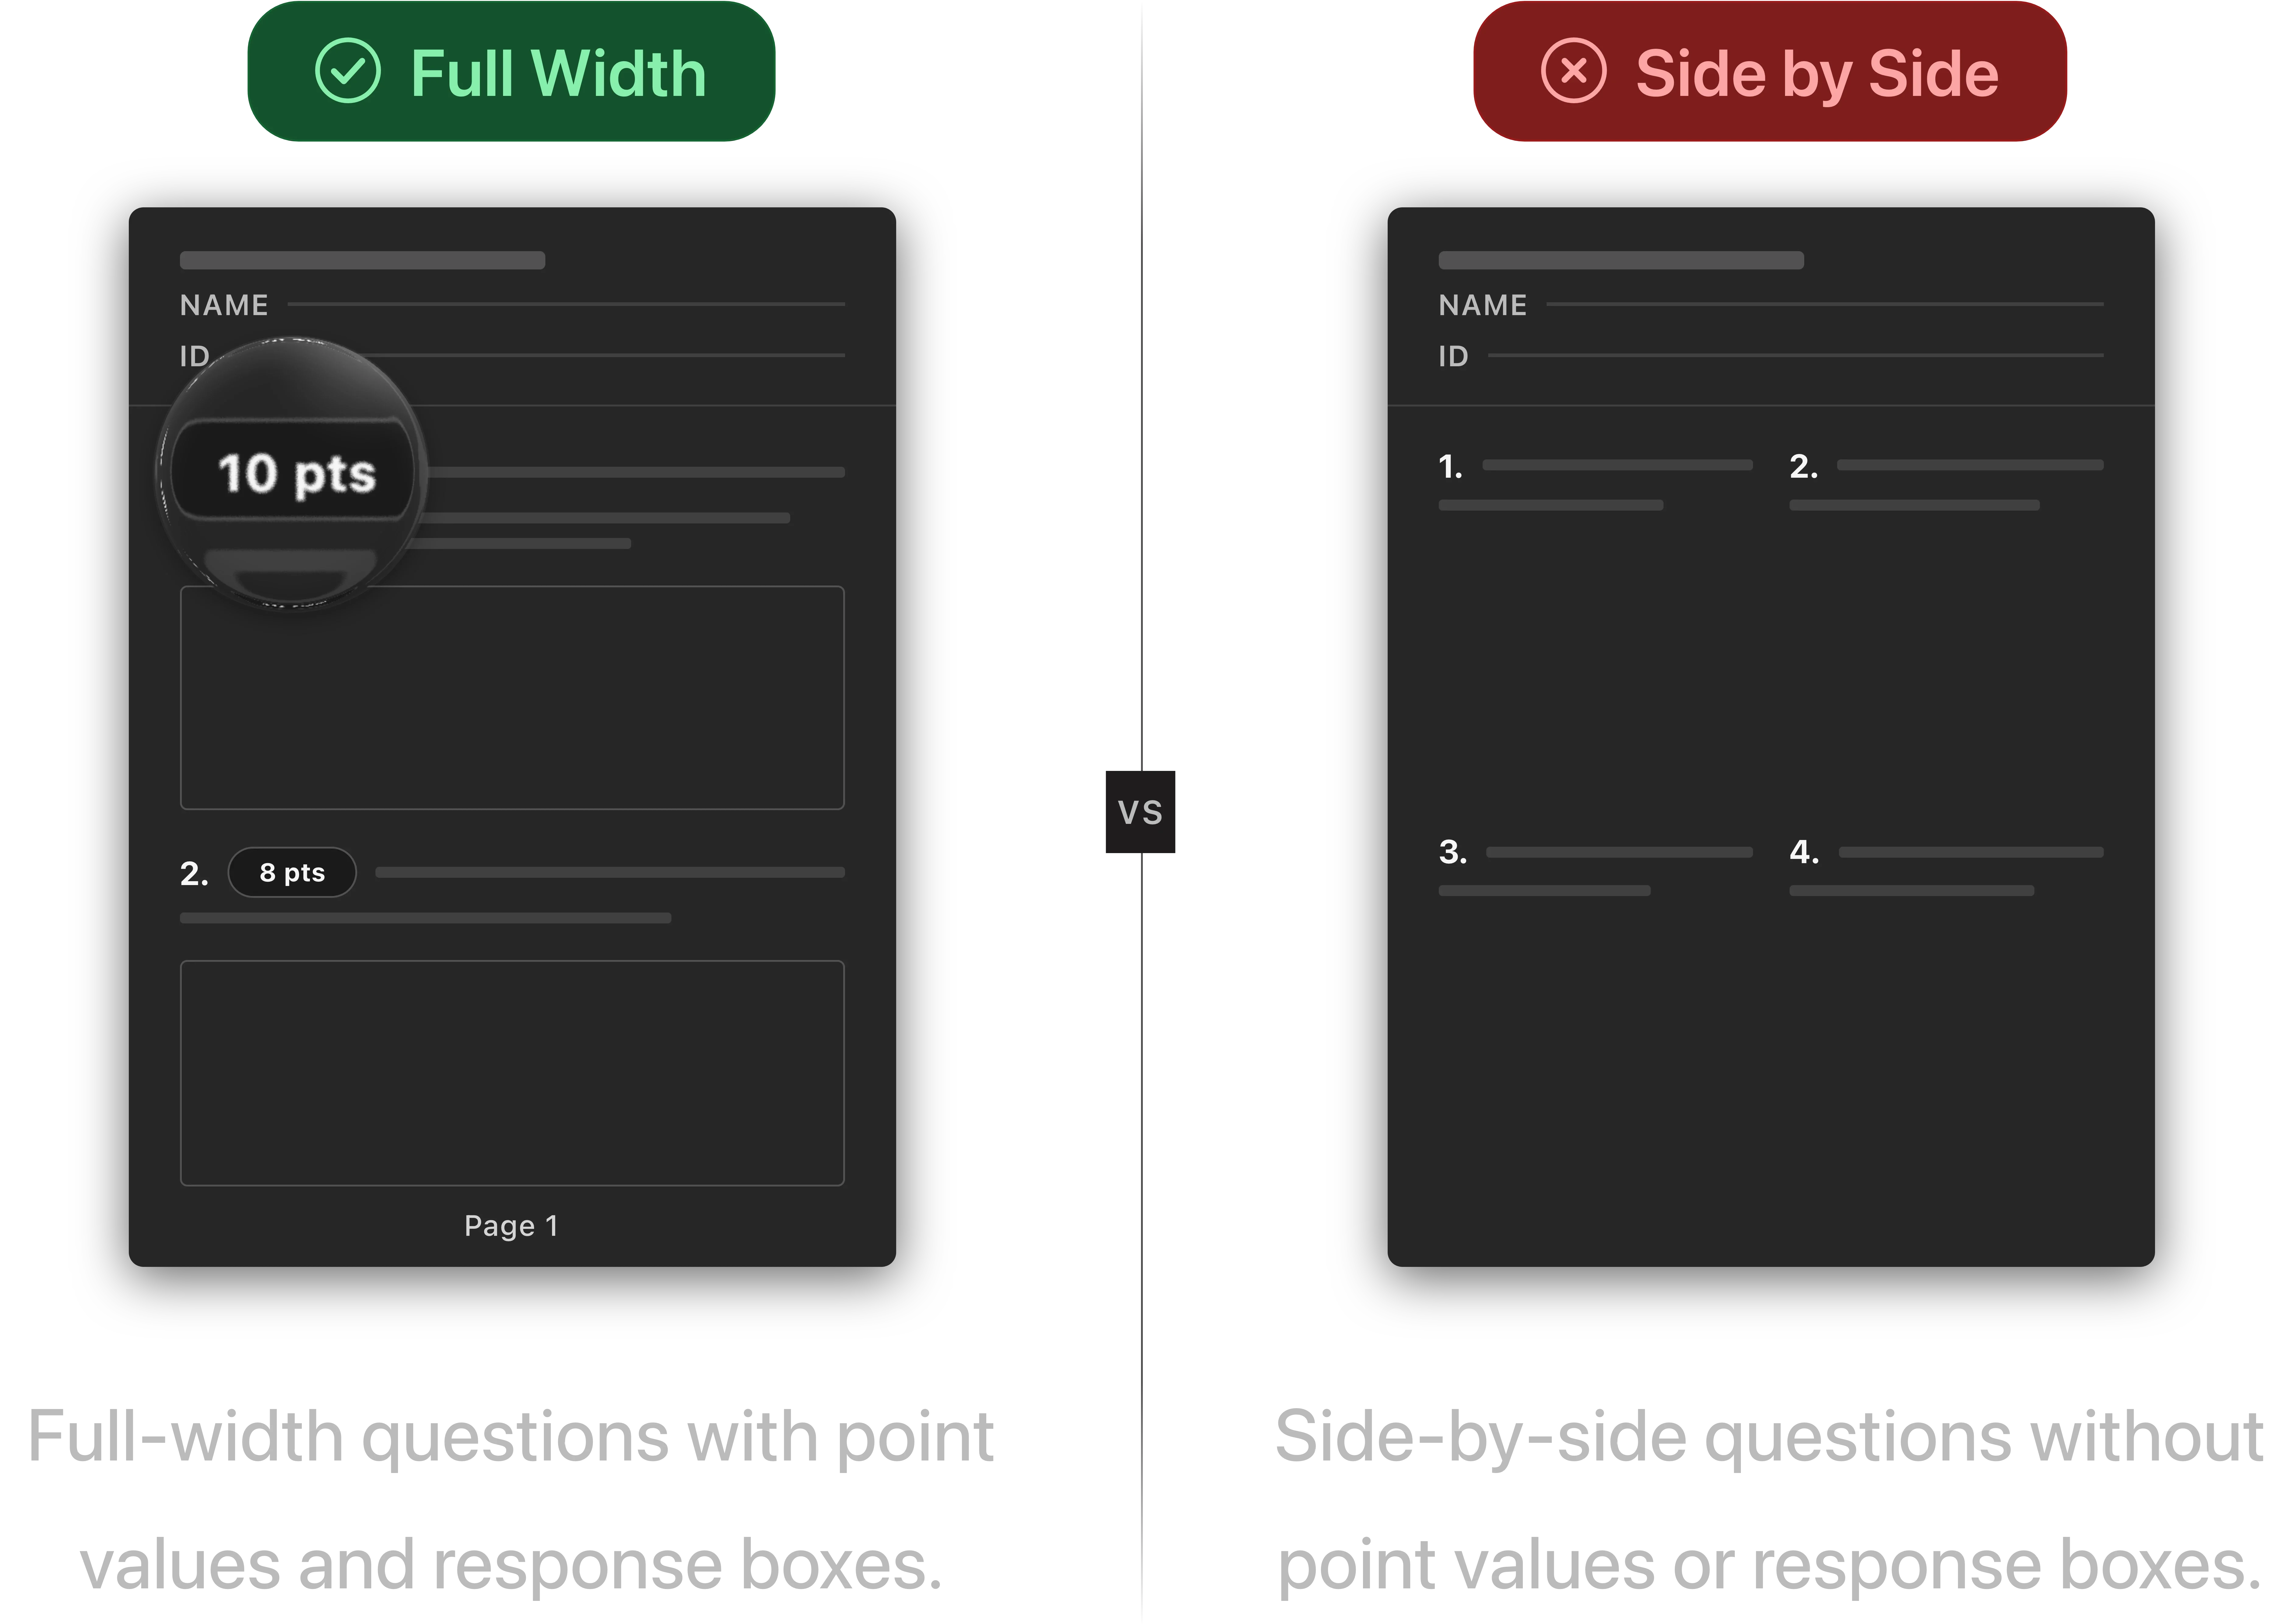
- Extend questions to the full page width. Avoid placing questions side by side.
- Specify point values in the question stem including each subquestion.
- Add a bordered answer box (bordered text box in Word) after each question, as large as possible, without overlapping questions, exceeding margins, or covering page numbers.
- Avoid answer boxes that span multiple pages, as Uflo does not support them.
Additional formatting tips
Additional formatting tips
- Use high-contrast black text on light backgrounds. Avoid watermarks in answer boxes.
- Use a standard, readable font (Arial, Times New Roman, or Calibri at 11–12pt).
- Keep content at least 0.5 inches from page edges, as scanners may clip margins.
- Include a brief instruction reminding students to write their name and ID.
- If your exam has multiple versions, include the version label on the cover or every page.
- Every page must contain text since scanners may skip blank pages and cause uneven page counts (common with scratch paper or odd-paged exams printed double-sided).
Saving Your Exam Files
Prepare and save the following files before printing:- Blank template (PDF only): Contains only question prompts, answer boxes, and student ID fields without solutions or rubric. Used to generate QR coded printouts.
- Complete template (Word or PDF): Includes all questions, solutions, and rubric. Used to import questions and configure AI grading.
- Keep original editable files in case revisions are needed.
CHEM101_Midterm_1
CHEM101_Midterm1_Complete.docx
CHEM101_Midterm1_Blank.pdf
CHEM101_Midterm1_Blank_QR.pdf
Phase 1.2 QR Codes and Printing
Before printing, upload the blank template so Uflo can stamp QR codes on each page.ImportantAlways use the blank exam template for this step. Students should not see solutions or rubric on their printed exam.
Uploading the Blank Template
Navigate to Uflo
In Uflo, navigate to the course you want to assess and create a chapter for the exam.
Create a New Assessment
Inside the chapter, click ”+ Test” to create an assessment. Set the name, due date, total points, and allowed attempts to 1, then uncheck the visibility box.
Best PracticeUse the preview tool to verify QR codes don’t overlap with question text or answer boxes.
Printing the Exam
- Print the downloaded PDF on standard white 8.5” × 11” paper at .
- Do not “fit to page” or scale to margins, as this can distort or cut off QR codes.
- Print one extra copy for your own records before the exam.
Finalize Before PrintingIf you change question content after QR codes have been generated, you must regenerate QR codes and reprint the exam. Finalize everything before printing.
Next: Before Administering
Upload your exam file and configure AI grading in Uflo.